 ( 318 ) Aug-7-2013
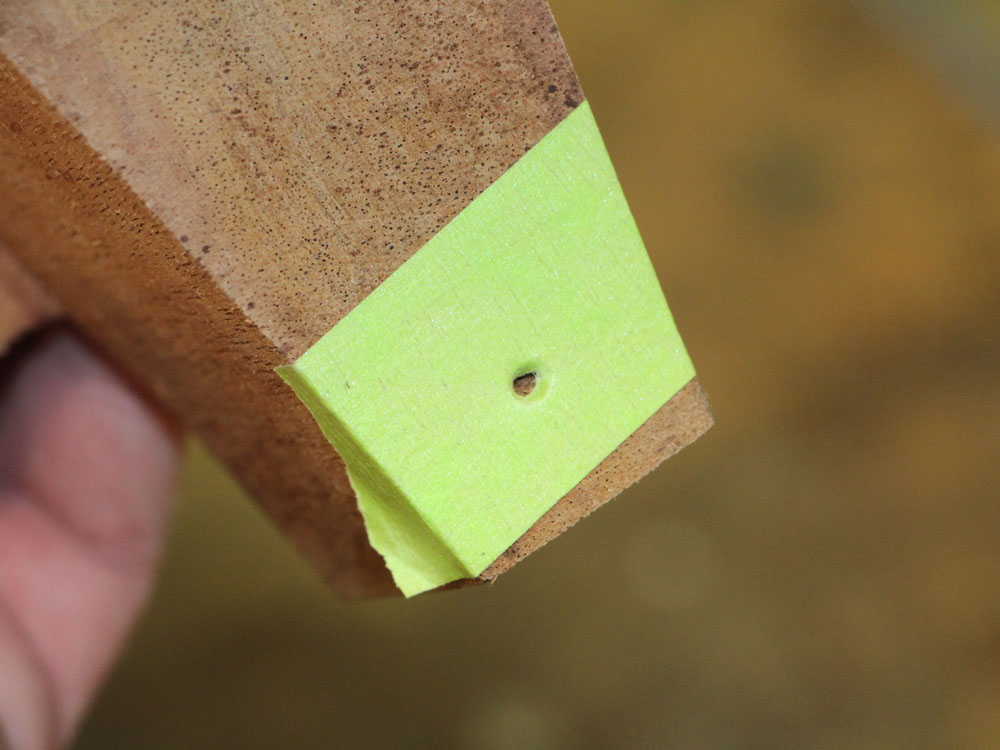
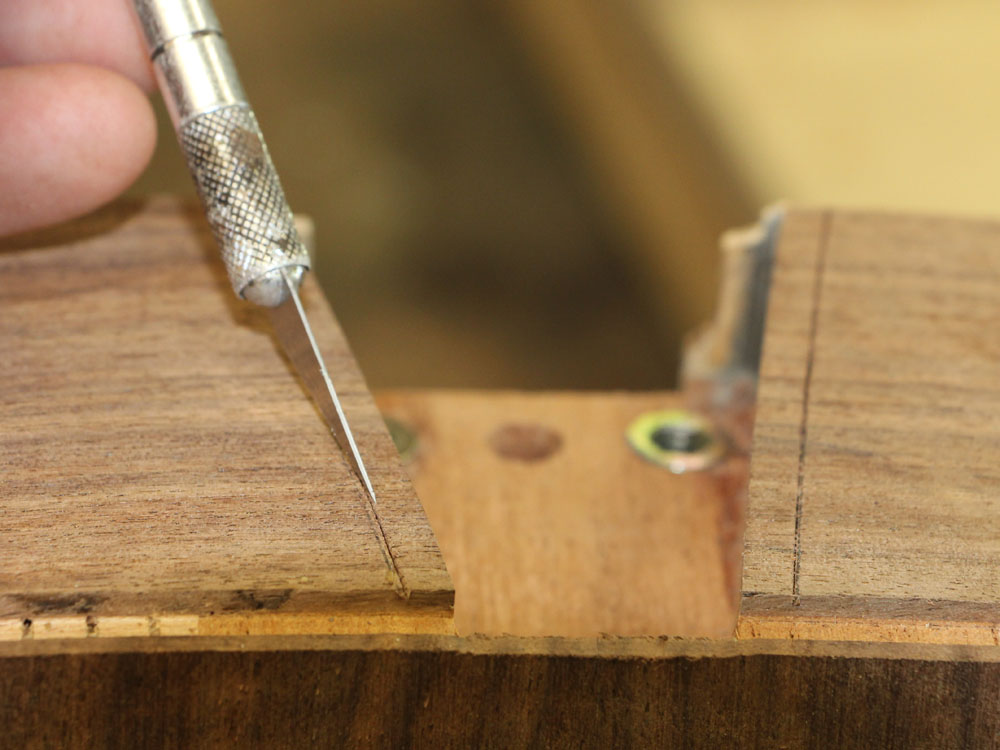
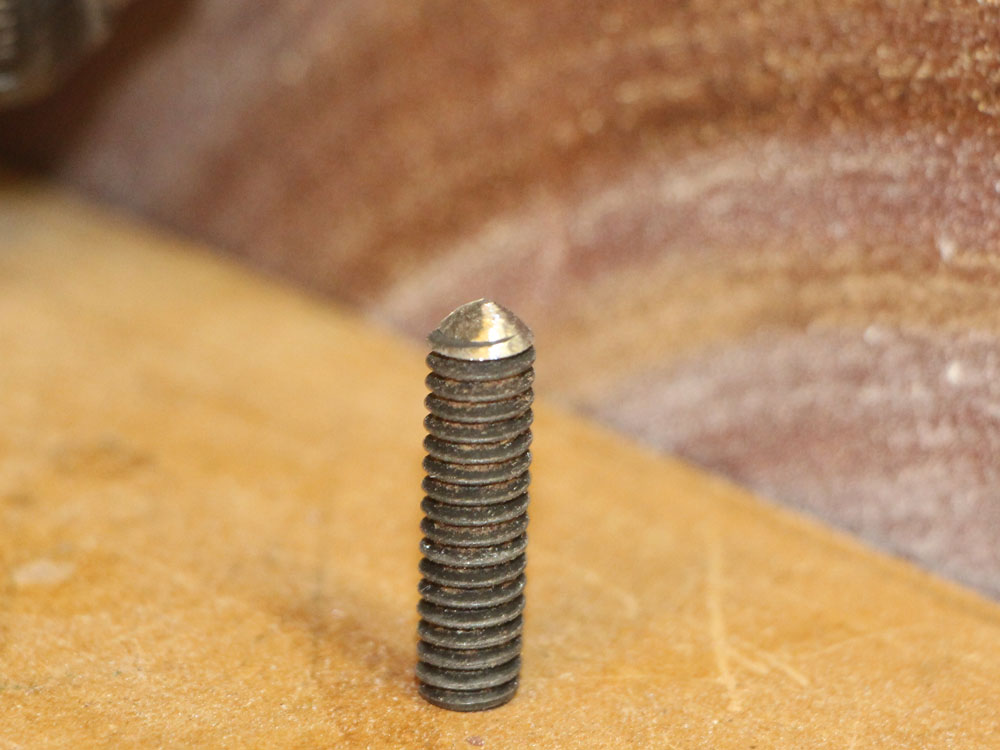
I need to accurately align the neck adjustment bolt with the wood insert in the heel channel. I use this sharpened set screw to make a pilot hole in the heel.
Walnut Body
Sitka Spruce Top
Mahogany Neck
Pistachio Fretboard, Bridge, and Headstock
Maple Binding
Herringbone Purfling
Gold Frets & Gotoh Tuners
25.4 Inch Scale Length
( 318 ) Aug-7-2013
I need to accurately align the neck adjustment bolt with the wood insert in the heel channel. I use this sharpened set screw to make a pilot hole in the heel.
 ( 319 ) Aug-7-2013
When I press the the neck into the heel channel the point of the set screw makes a mark where the bolt should go.
 ( 320 ) Aug-7-2013
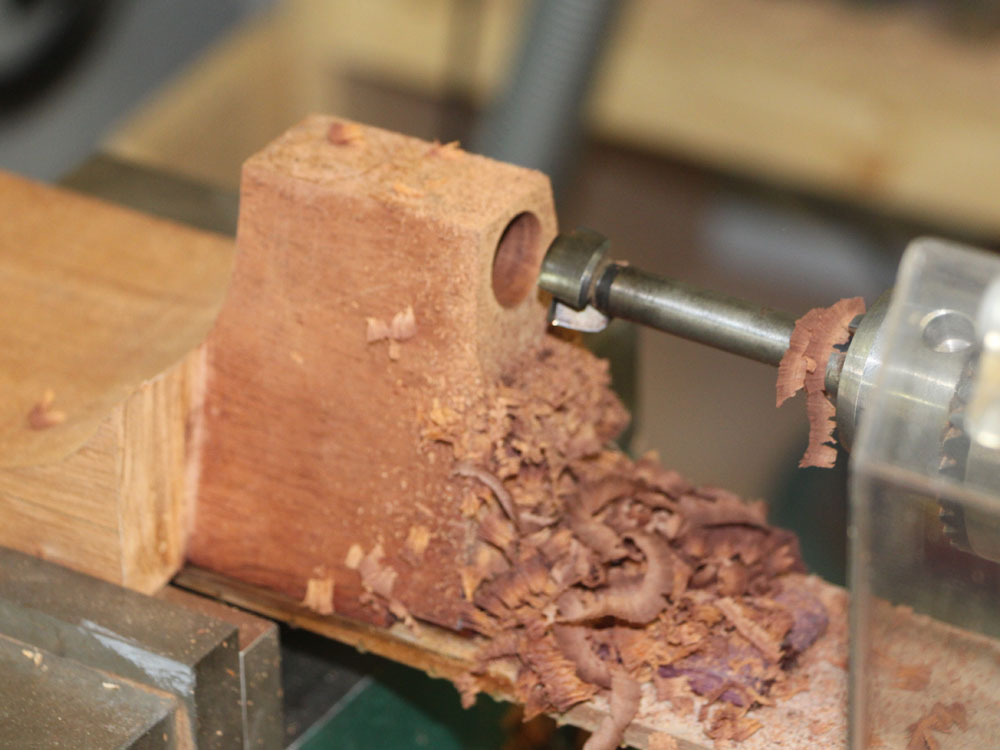
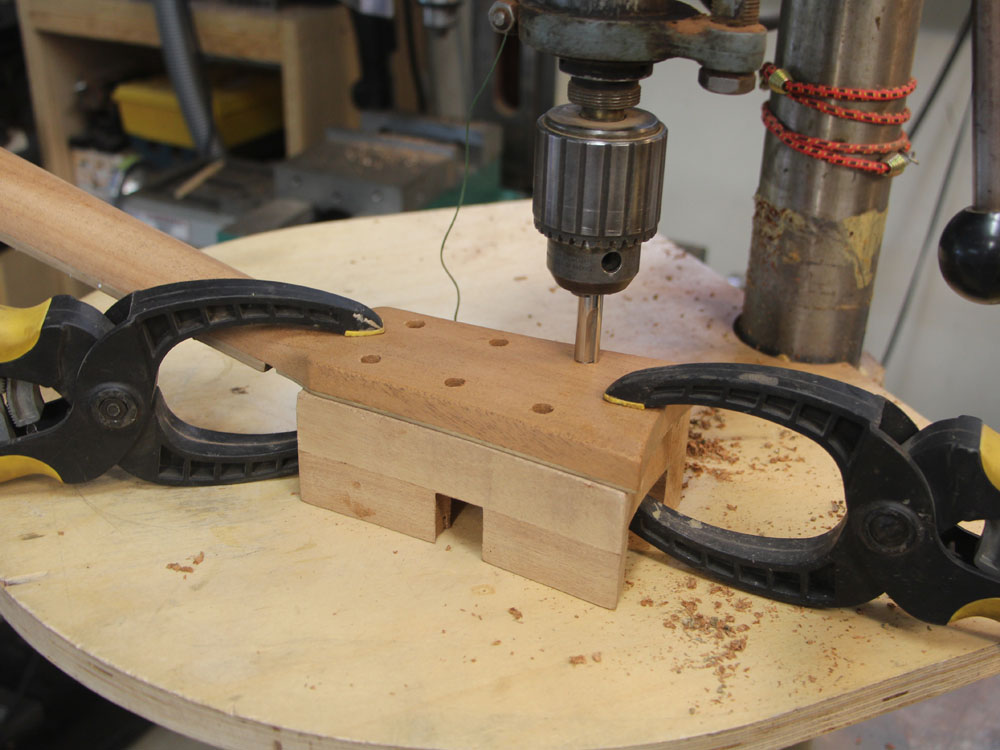
I use the milling machine to drill the hole for the adjustment bolt.
 ( 321 ) Aug-7-2013
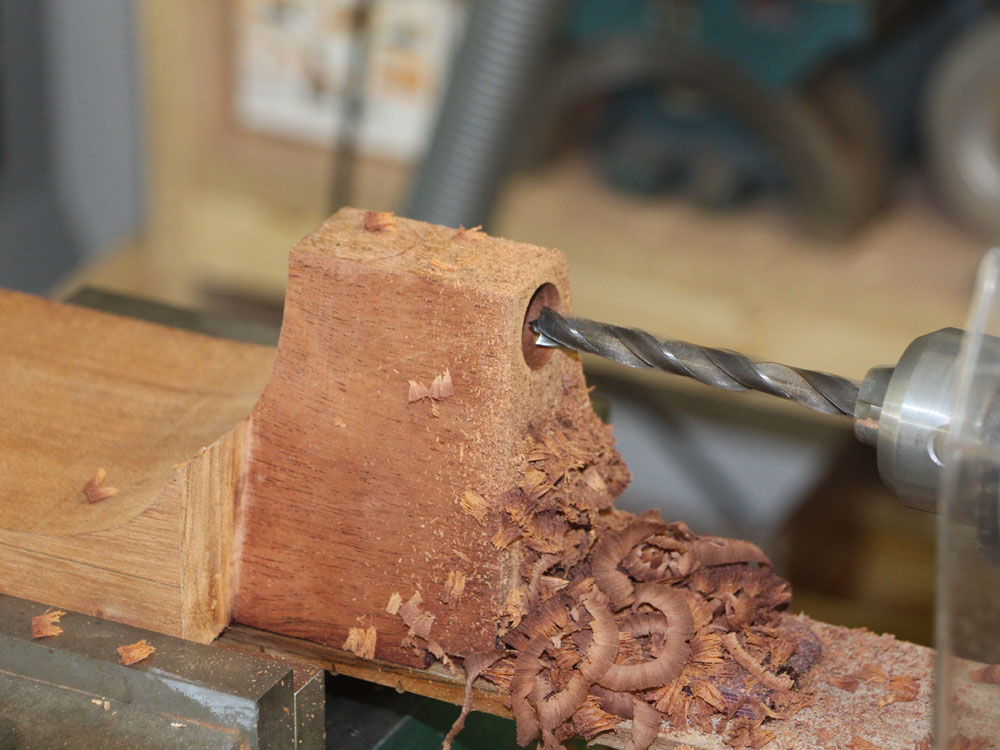
And follow through with a hole that the adjustment key will fit through.
 ( 322 ) Aug-7-2013
I try hard to get the hole to go straight through the heel and come out in the center.
 ( 323 ) Aug-7-2013
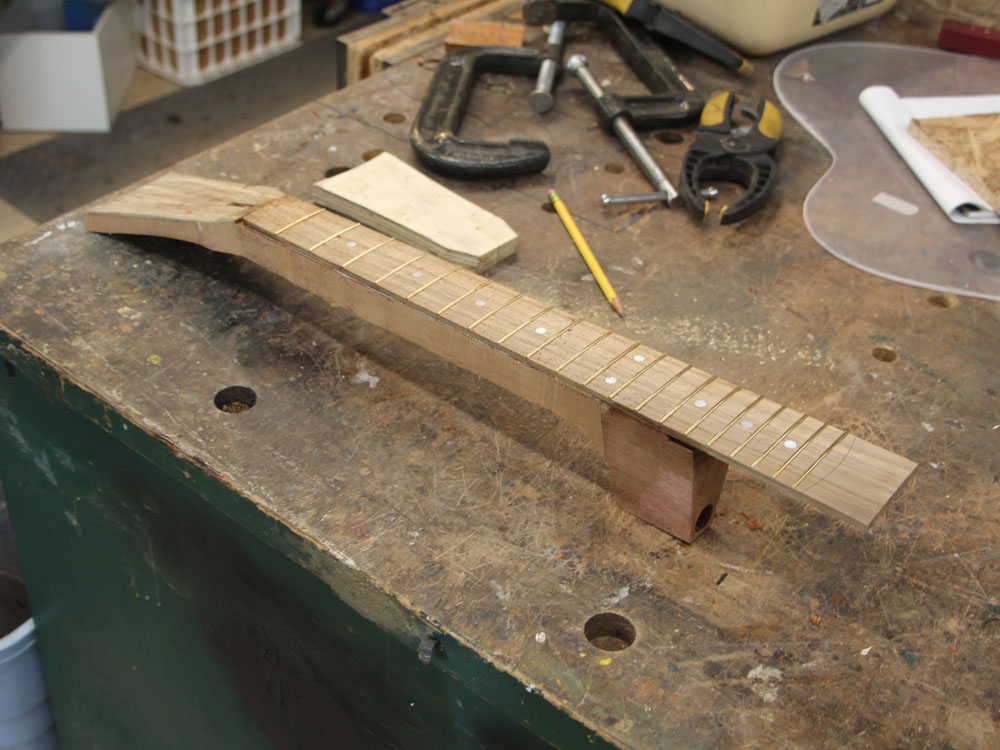
Here I am trimming off the excess wings from the neck assembly.
 ( 324 ) Aug-7-2013
Starting to look like a guitar neck.
 ( 325 ) Aug-7-2013
I have mounted a router template on the head stock.
 ( 326 ) Aug-7-2013
This router bit will follow the template and make the Portland Guitar signature headstock.
 ( 327 ) Aug-7-2013
Here I am using a safety plane (there is nothing safe about it) to trim the neck down to its final dimension.
 ( 328 ) Aug-7-2013
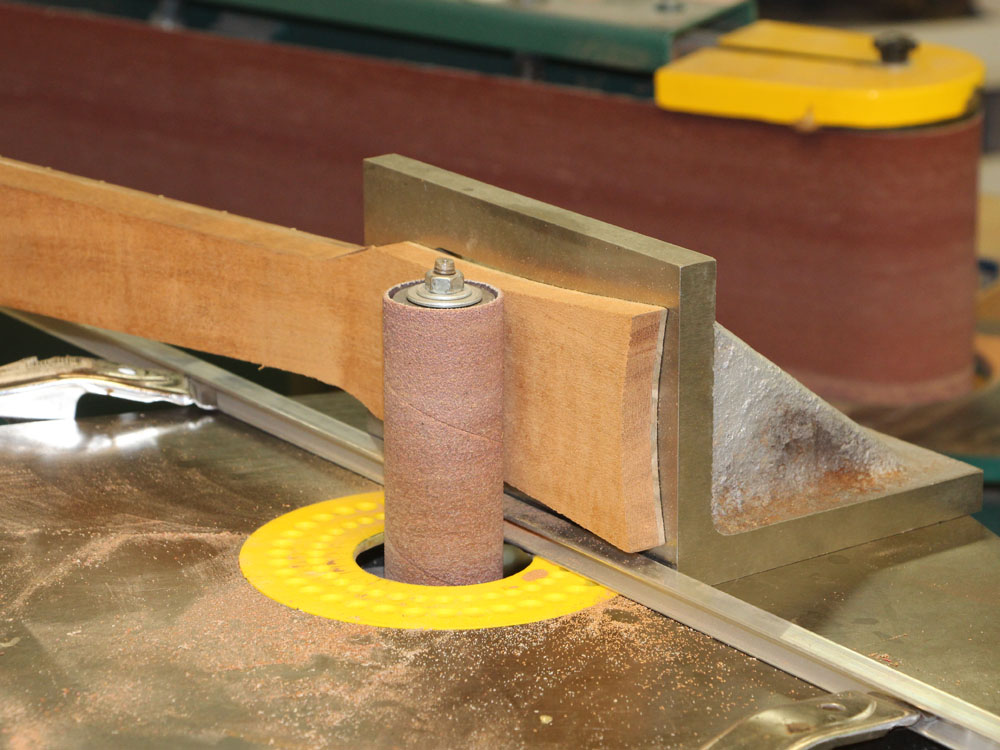
I have mounted the head stock on the angle iron and use the oscillating sander to trim the back of the head stock to its final dimension. The aluminum rail guides the angle iron so the head stock will be flat.
 ( 329 ) Aug-7-2013
And a little hand sanding to finish it.
 ( 330 ) Aug-7-2013
I take great care in the transition zone of the neck.
 ( 331 ) Aug-7-2013
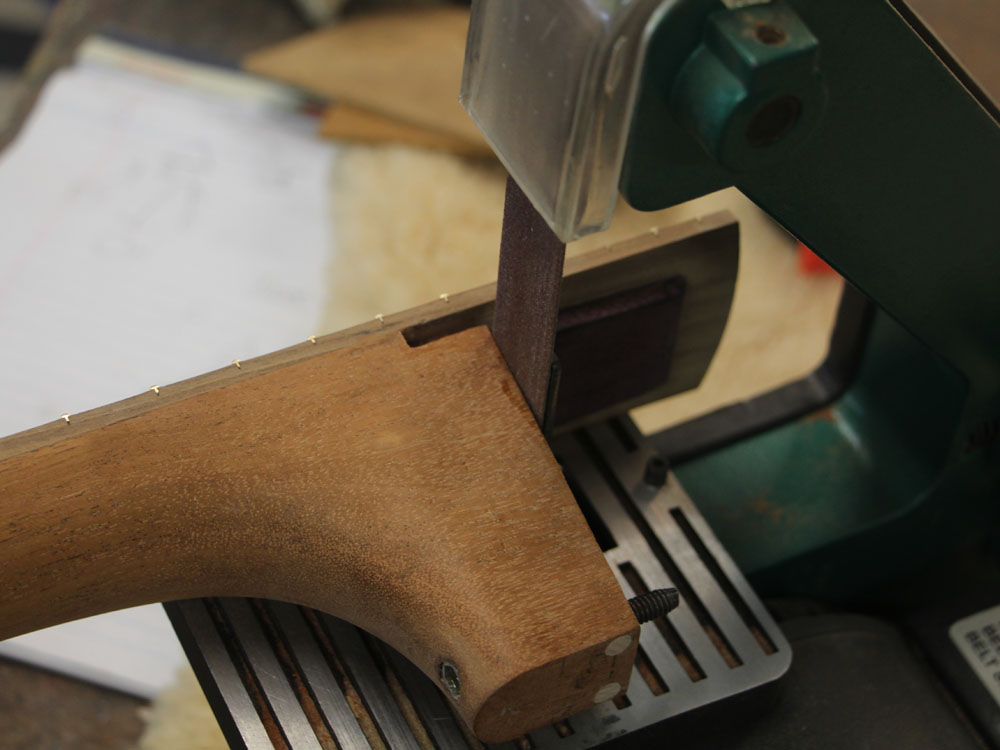
Trimming up the heel with the belt sander.
 ( 332 ) Aug-7-2013
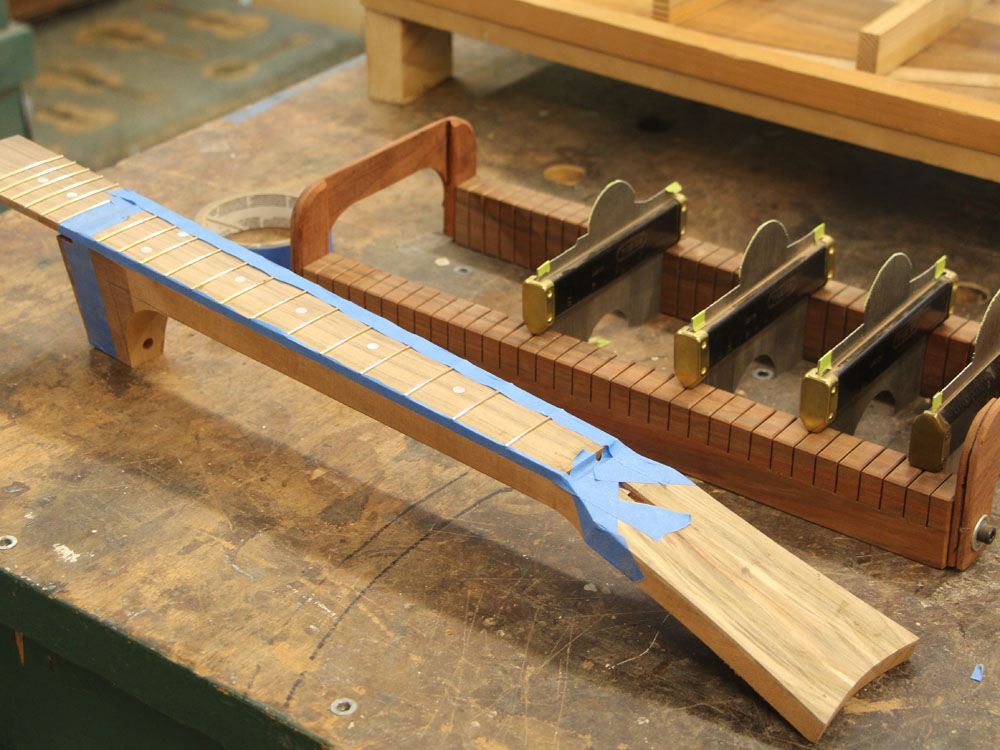
Now I will use the contour gauges to guide me as I shape the neck.
 ( 333 ) Aug-7-2013
The belt sander takes care of the heavy lifting.
 ( 334 ) Aug-7-2013
Checking the shape against the templates I made from the guitar Walt likes. I really don't want to take too much wood away at once as it is very difficult to put back if I make a mistake. I never ever make mistakes... really... never, nope not once ever... nope, not me.
 ( 335 ) Aug-7-2013
And measuring.
 ( 336 ) Aug-7-2013
The multitool sander takes care of some of the fine tuning.
 ( 337 ) Aug-7-2013
And a little hand sanding.
 ( 338 ) Aug-7-2013
Here I am installing a wood insert for the strap button.
 ( 339 ) Aug-7-2013
And now I am setting up to install the hardware for the neck adjustment mechanism. You can see the bolt, washer, o-ring and oak flange sitting on the edge of the vice.
 ( 340 ) Aug-7-2013
A bit of glue goes on the oak flange as it is installed.
 ( 341 ) Aug-7-2013
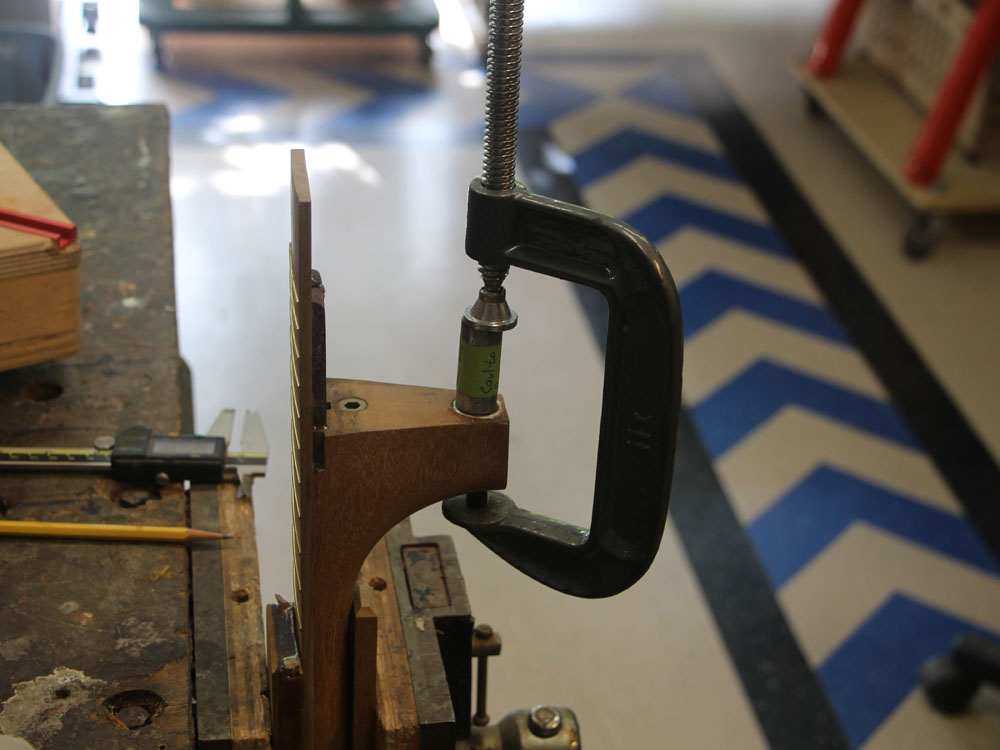
I use a C-clamp to compress the o-ring just a bit. This will ensure that the neck wont rattle around when the strings are changed.
 ( 342 ) Aug-7-2013
Here I have set up the binding router (The Universal Bindalator). This tools hold the router parallel to the sides of the guitar as the router is moved around the periphery.
 ( 343 ) Aug-7-2013
The platen is shaped like a bowl so it only makes contact wit the surface of the guitar right next to the router bit.
 ( 344 ) Aug-7-2013
This lets me accurately control the bit's position and the depth of the channels.
 ( 345 ) Aug-7-2013
A nice clean channel.
 ( 346 ) Aug-7-2013
The top gets the same treatment as the back.
 ( 347 ) Aug-7-2013
But the top gets an addition channel for the herringbone purfling.
 ( 348 ) Aug-7-2013
Here I am drilling holes in the bottom of the heel of the neck for the retaining pins. These pins prevent the flange from being pulled out of the heel by the tension on the strings.
 ( 349 ) Aug-7-2013
Two 1/4 inch dowels pass through the heel and the edge of the flange locking it in place.
 ( 350 ) Aug-7-2013
The dowels get glued in place.
 ( 351 ) Aug-7-2013
And they get sanded flush.
 ( 352 ) Aug-7-2013
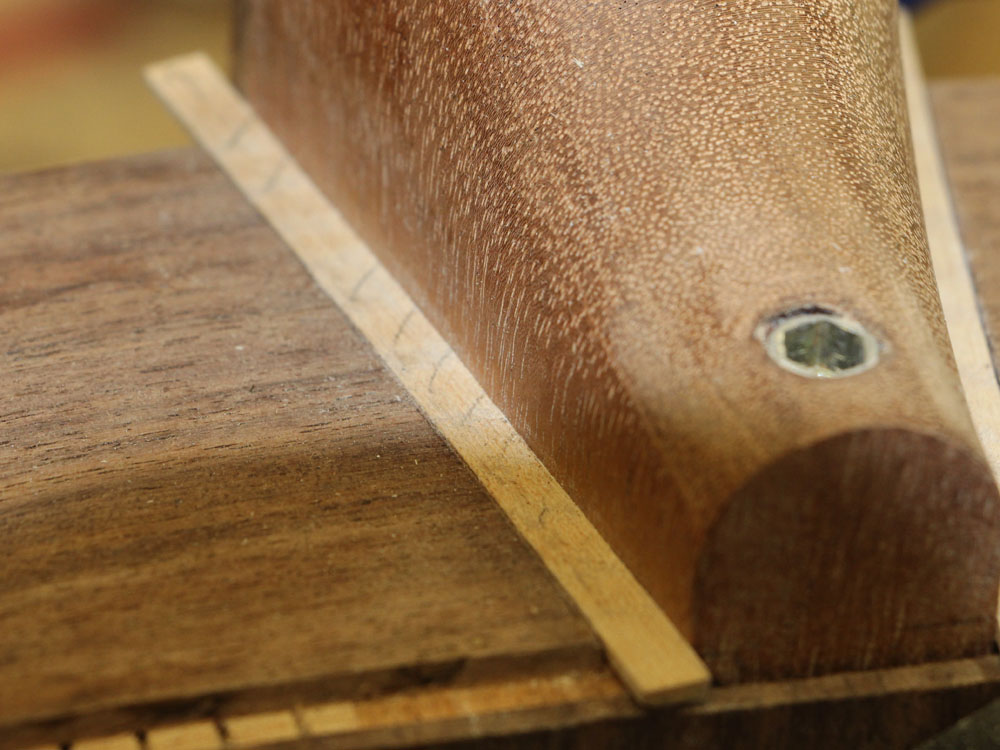
Now I mount the neck in the heel channel of the body and center it up. I then mark the position of the binding.
 ( 353 ) Aug-7-2013
I scribe a line.
 ( 354 ) Aug-7-2013
Mark the line with masking tape.
 ( 355 ) Aug-7-2013
And use the Dremel tool to route the channel.
 ( 356 ) Aug-7-2013
Ready to go.
 ( 357 ) Aug-7-2013
Now with the neck pressed into position with the hand clamp I mount neck and install the heel binding.
 ( 358 ) Aug-7-2013
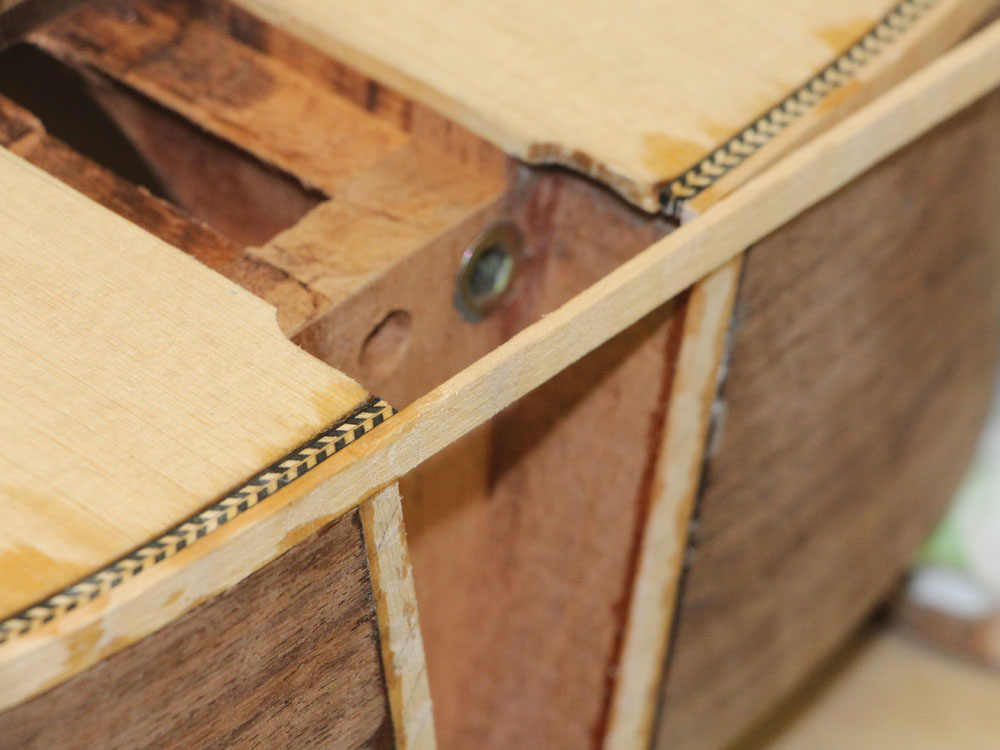
I am look to have a nice snug fit between the heel and binding with an even slot from top to bottom..
 ( 359 ) Aug-7-2013
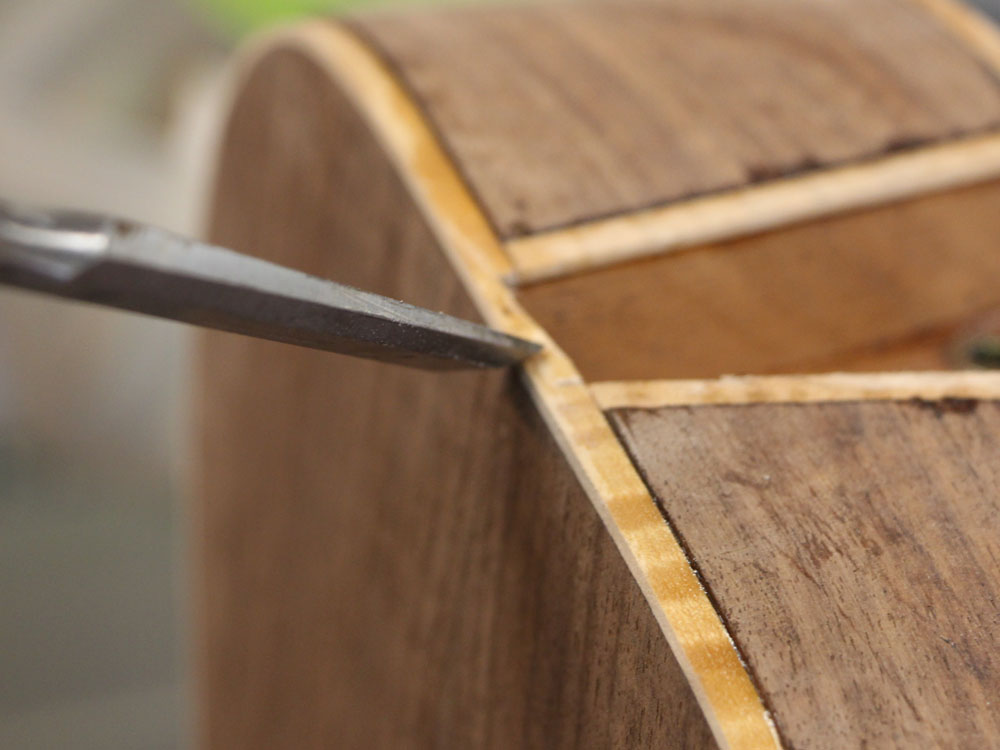
I trim the ends of the binding with a small saw.
 ( 360 ) Aug-7-2013
 ( 361 ) Aug-7-2013
Now I start to install the edge purfling and binding.
 ( 362 ) Aug-7-2013
I work a few inches at a time making sure everything fits with no gaps.
 ( 363 ) Aug-7-2013
I usually pin the purfling down every inch or so with a drop of glue and then go back and flood assembly with cyanoacrylate glue when I am happy with the fit.
 ( 364 ) Aug-7-2013
The maple binding goes on after the purfling. I prefer to install one piece at a time rather than all of the pieces at once.
 ( 365 ) Aug-7-2013
I use a push stick to press the binding into the channel. I don't want any little gaps.
 ( 366 ) Aug-7-2013
The edge binding overlaps the heel binding.
 ( 367 ) Aug-7-2013
A small saw is used to trim the ends so they fit snuggly together.
 ( 368 ) Aug-7-2013
 ( 369 ) Aug-7-2013
It looks a bit of a mess right now, but everything gets cleaned u in the end.
 ( 370 ) Aug-7-2013
 ( 371 ) Aug-7-2013
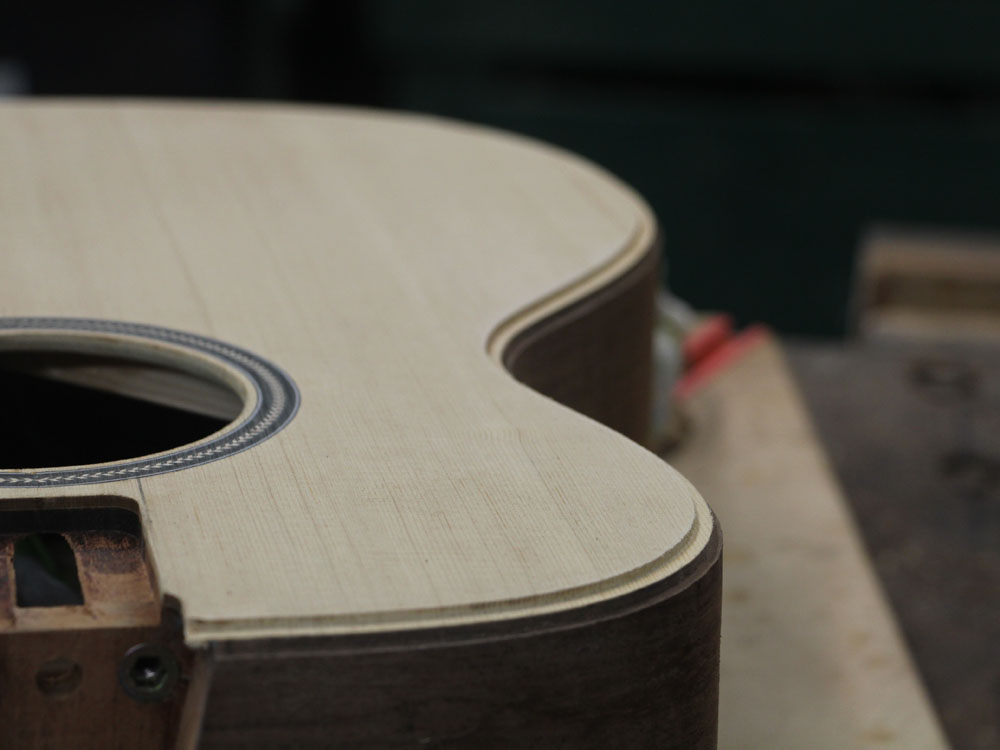
With the binding installed I sand everything flush to the top and back.
 ( 372 ) Aug-7-2013
The bottom of the heel binding gets a bit of hand work.
 ( 373 ) Aug-7-2013
 ( 374 ) Aug-7-2013
I use a sanding cylinder to sand the sides flush with the binding.
 ( 375 ) Aug-7-2013
And the multi tool finishes the job.
 ( 376 ) Aug-7-2013
The the fretboard wing channels get trimmed up to their final dimension now.
 ( 377 ) Aug-7-2013
And the end of the fretboard gets trimmed to size now that we can put the neck and body together.
 ( 378 ) Aug-7-2013
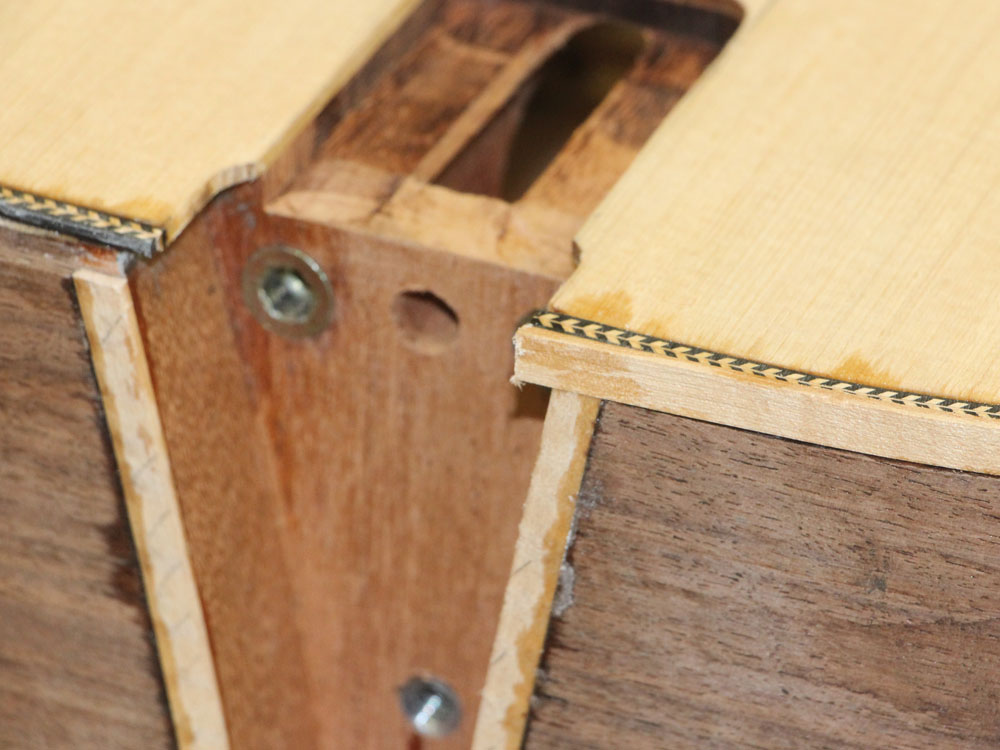
The set screws in the heel channel leave indentations in the back of the heel when the neck is attached.
 ( 379 ) Aug-7-2013
Her I am drilling holes where the set screws left their mark.
 ( 380 ) Aug-7-2013
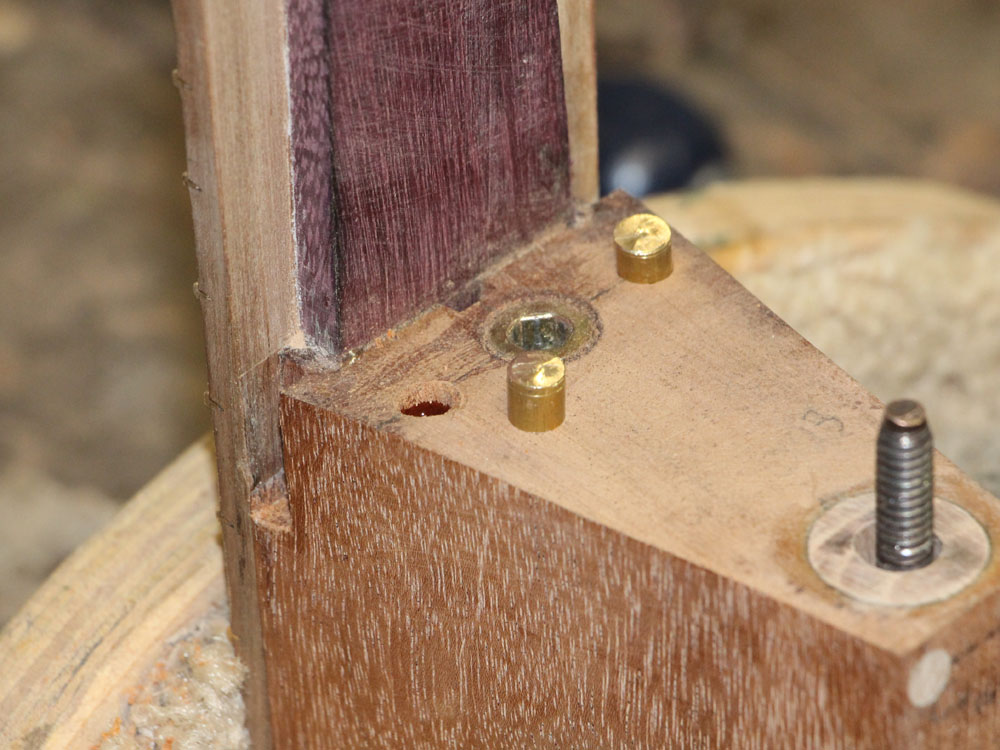
And I install brass plugs to provide a good solid mating surface for the set screws.
 ( 381 ) Aug-7-2013
And the belt sander sands them flush.
 ( 382 ) Aug-7-2013
Nice shiny brass plugs. I use brass because the set screws will bit into it and there won't be any possibility of the neck sliding around.
 ( 383 ) Aug-7-2013
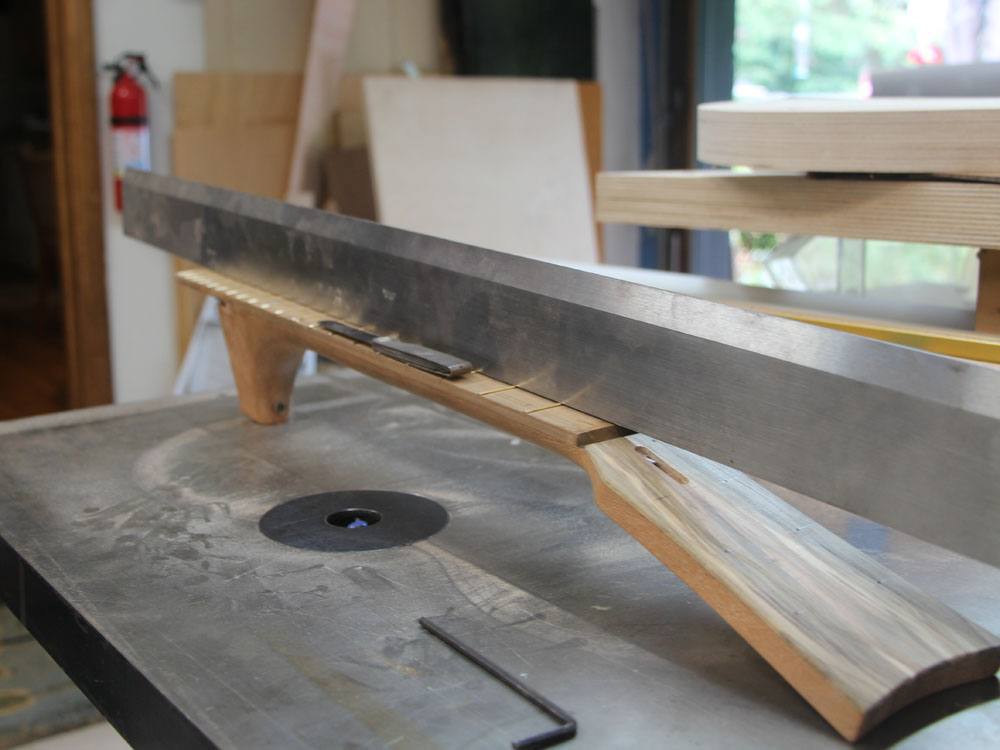
I use my very straight edge to check the lay of the frets.
 ( 384 ) Aug-7-2013
I will dress the frets until they all have the same height. I work until a 2 mil feeler gauge won't fit between the straight edge and the frets.
 ( 385 ) Aug-7-2013
And then I use a special sanding stick to re-crown the frets.
 ( 386 ) Aug-7-2013
And a small file to shape the ends of the frets into little hemispheres.
 ( 387 ) Aug-7-2013
Progressively finer sanding cloths bring out the shine. I want the frets to feel nice and smooth and I want them to light up like a string of pearls when they are illuminated.
 ( 388 ) Aug-7-2013
A bit of PVC is used for the edge dots.
 ( 389 ) Aug-7-2013
They get clipped and sanded flush.
 ( 390 ) Aug-7-2013
After marking their position I drill the holes for the tuning machines.
 ( 391 ) Aug-7-2013
 ( 392 ) Aug-7-2013
And before I assemble the guitar again I put a crown on the heel block set screws.
 ( 393 ) Aug-7-2013
This will provide a solid fulcrum for the neck as it is adjusted.
 ( 394 ) Aug-7-2013
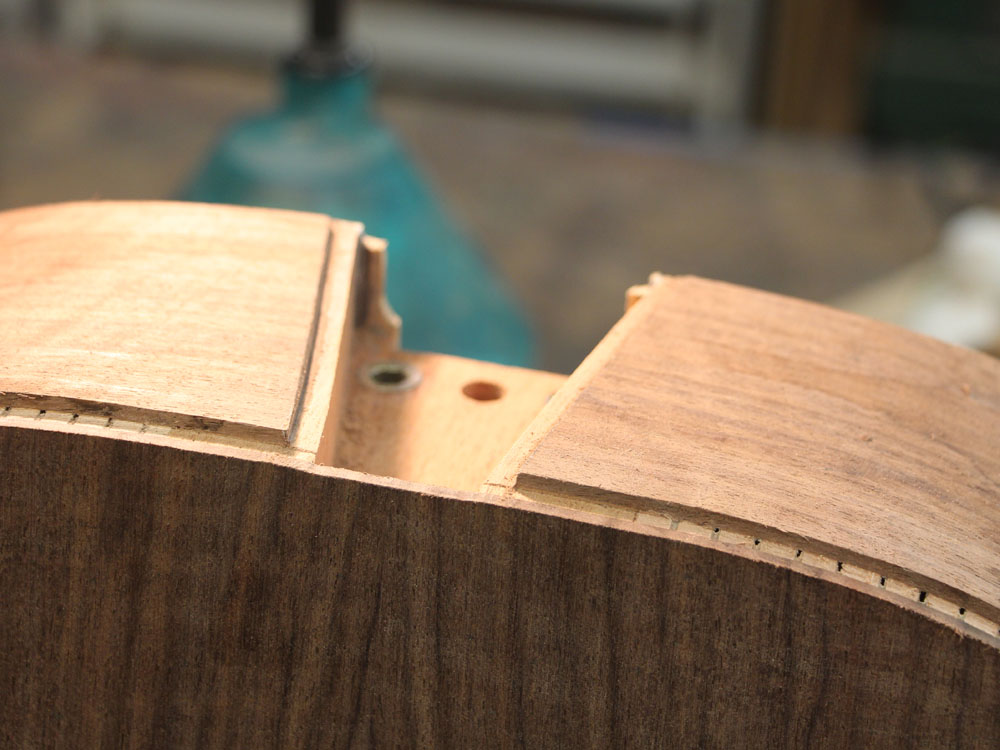
At this point the end of the heel does not match the angle of the back.
 ( 395 ) Aug-7-2013
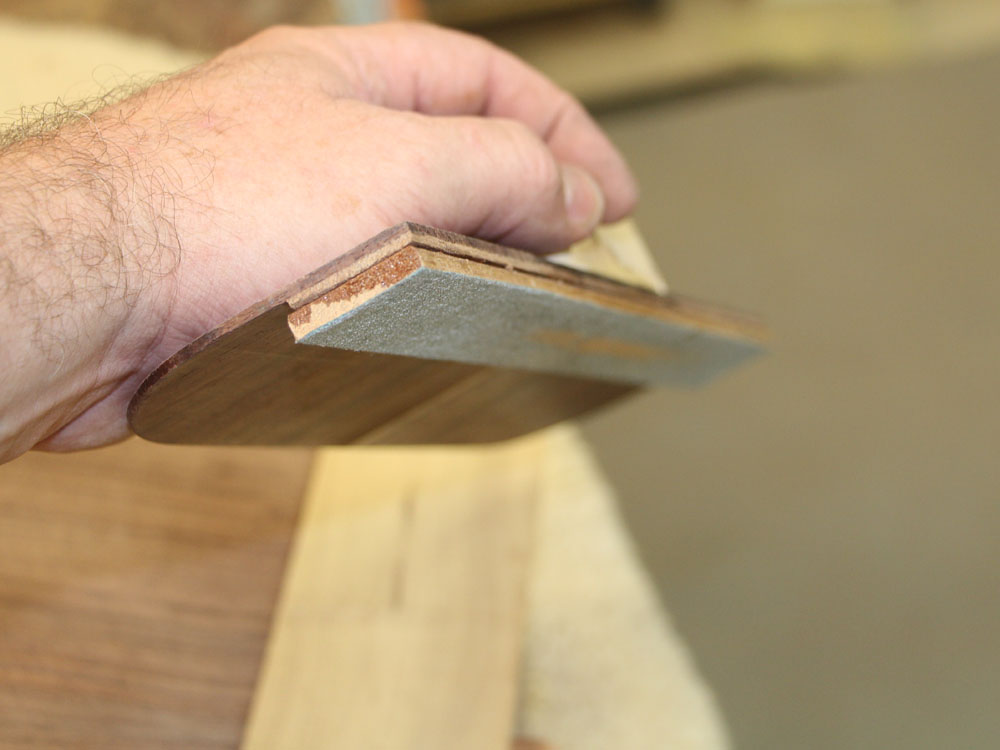
I use this special sanding block to match the heel to the back. The large platen slides along the back while the offset sanding surface sands the end of the heel coplanar with the back.
 ( 396 ) Aug-7-2013
Ta da!
 ( 397 ) Aug-7-2013
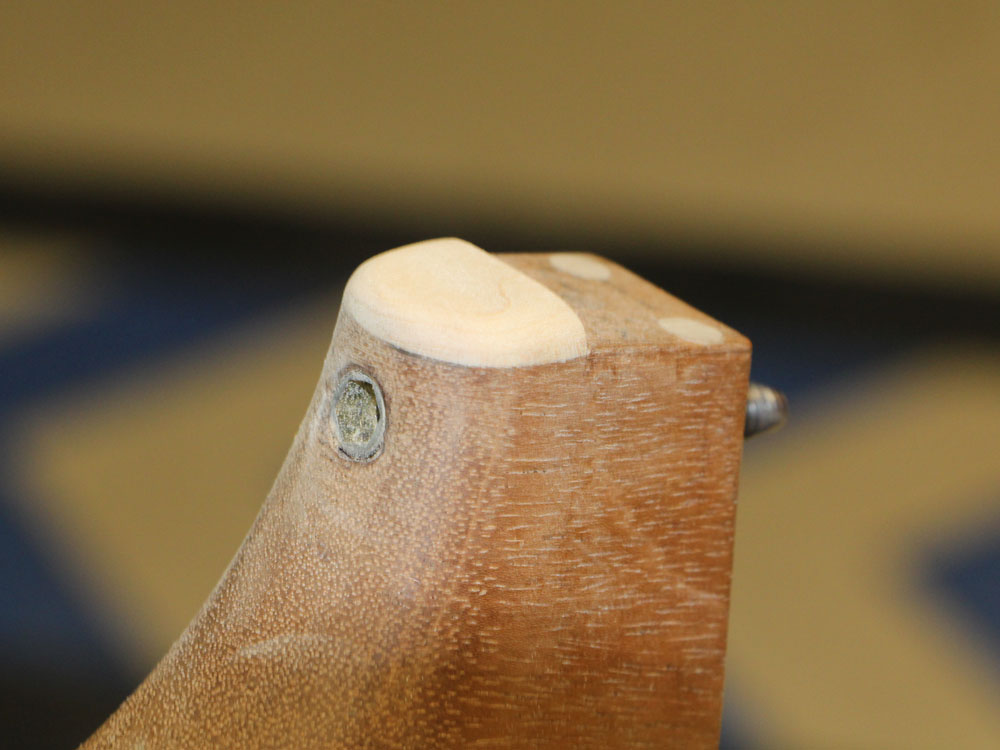
And then I glue the heel cap on the end of the heel.
 ( 398 ) Aug-7-2013
The maple heel cap will match the binding.
 ( 399 ) Aug-7-2013
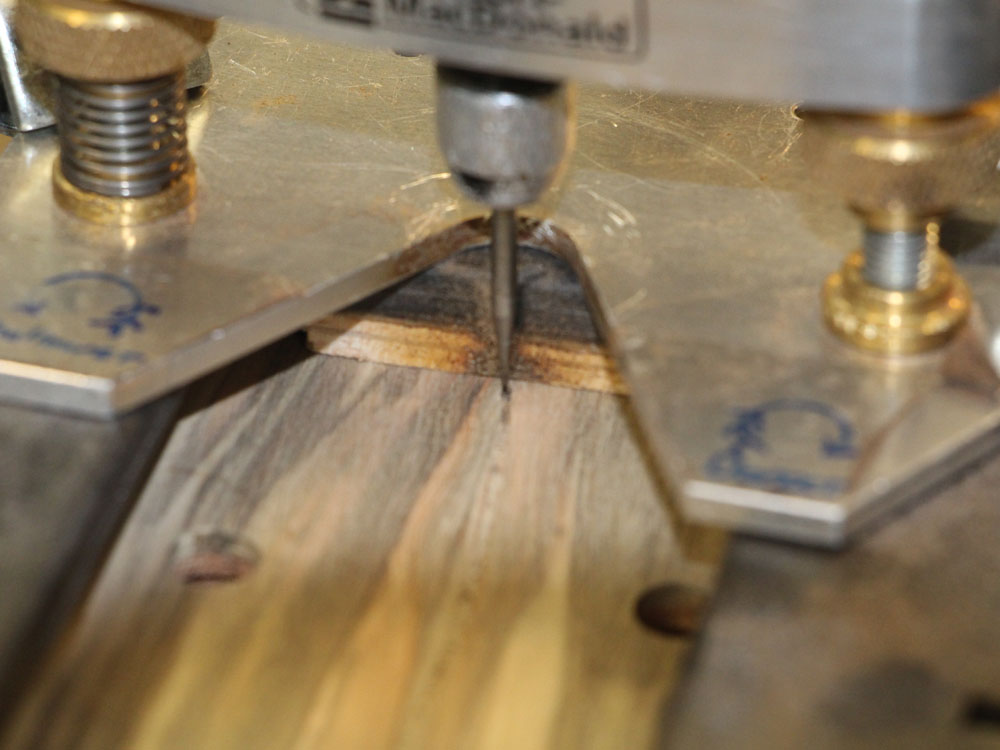
I use a routing pantograph to make the channel for the Portland Guitar Rose in the head stock.
 ( 400 ) Aug-7-2013
I mount the Dremel tool on the platen.
 ( 402 ) Aug-7-2013
And the stylist will follow this template. I get a bout a 2.5 to 1 reduction from the template.
 ( 403 ) Aug-7-2013
I use a bit that nearly matches the width of the gold wire. teeny tiny.
 ( 404 ) Aug-7-2013
And here is a channel in the shape of the rose.
 ( 405 ) Aug-7-2013
I carefully bend the gold wire and press it into place.
 ( 406 ) Aug-7-2013
A bit if CA glue is used to fix the wire in place.
 ( 407 ) Aug-7-2013
And then I sand everything flush.
 ( 408 ) Aug-7-2013
My daughter, Jasmine Rose, designed this rose icon for Portland Guitar's Logo, so this is The Portland Guitar Jasmine Rose.
 ( 409 ) Aug-7-2013
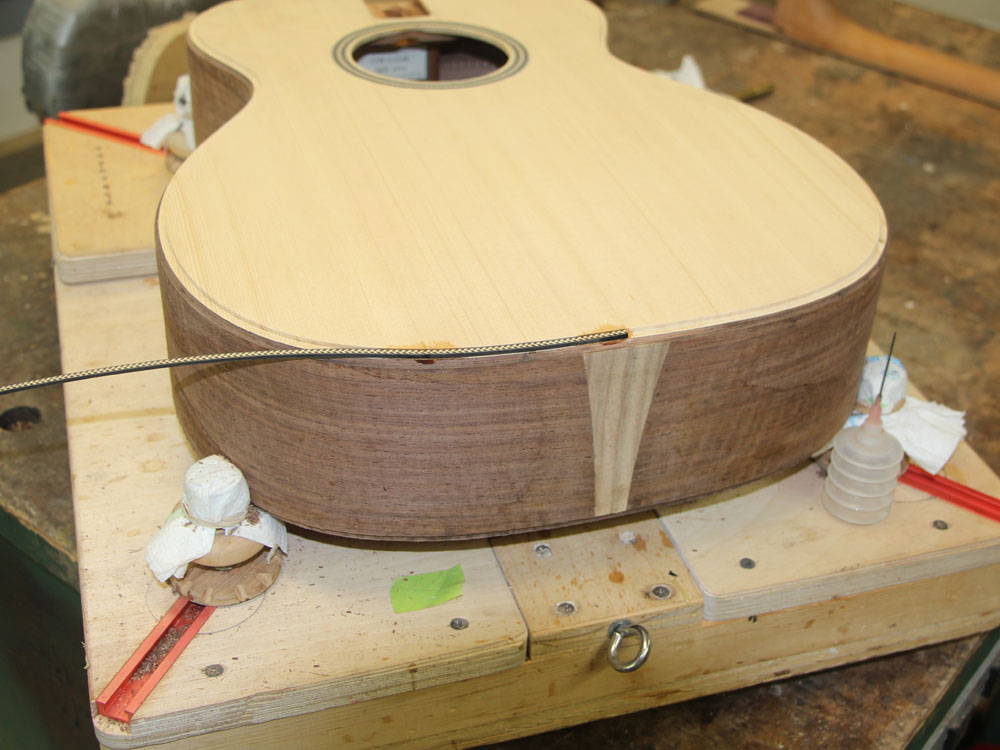
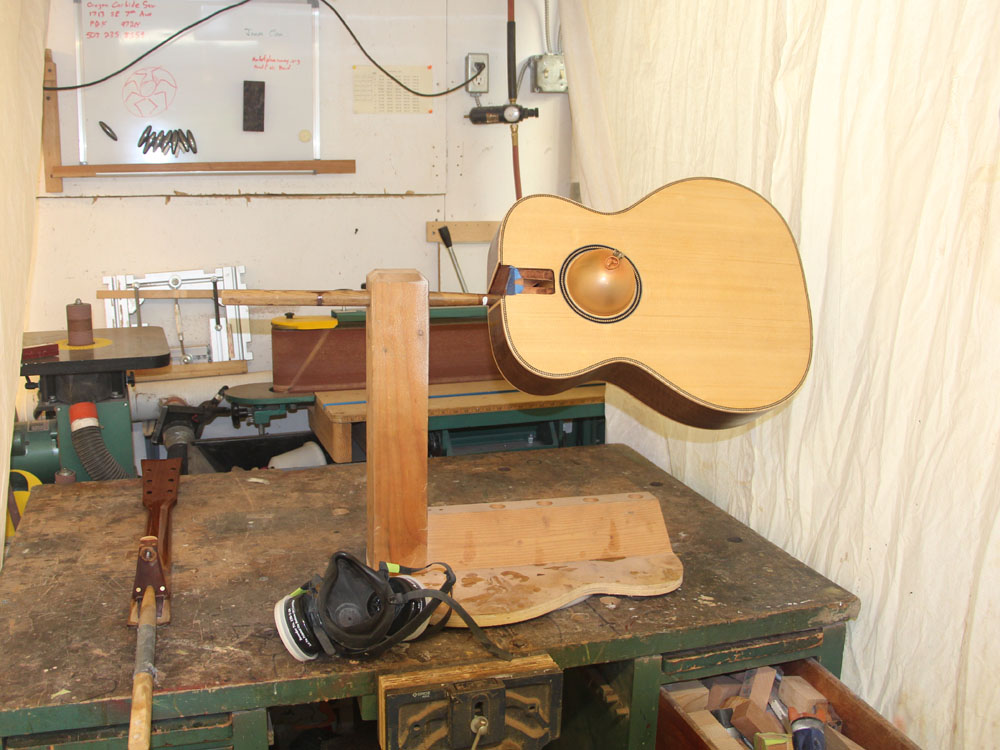
A picture of the guitar with neck attached and tuning machines installed.
 ( 410 ) Aug-7-2013
I use an epoxy mixture to fill the pores in the walnut.
 ( 411 ) Aug-7-2013
Nice figure.
 ( 412 ) Aug-7-2013
 ( 413 ) Aug-7-2013
And now with the epoxy cured and all of the defects I can find addressed we are ready to apply the lacquer.
 ( 414 ) Aug-7-2013
This is a process of laying down several coats of lacquer and then sanding away the irregularities... repeat until we are happy with the results..